This is it! The big giveaway I’ve been hinting at for a while over on our Instagram page. This is the only place you can enter the giveaway so watch the entire video for details on how to enter! Be sure to subscribe to our YouTube channel for exciting new, regular content planned for 2020 Read more
ProStaff Reviews

This is it! The big giveaway I’ve been hinting at for a while over on our Instagram page. This is the only place you can enter the giveaway so watch the entire video for details on how to enter!
Be sure to subscribe to our YouTube channel for exciting new, regular content planned for 2020! You can find us at MechanicalhubTV

Viega Rapid Grid A recent radiant floor install was the perfect opportunity to try out the high impact polystyrene foam board system for my first time. Rapid Grid is a 2’x4′ interlocking foam board system with raised knobs that hold 3/8″-5/8″ PEX tubing with minimal use of staples or the need for wire tying to Read more
Viega Rapid Grid
A recent radiant floor install was the perfect opportunity to try out the high impact polystyrene foam board system for my first time. Rapid Grid is a 2’x4′ interlocking foam board system with raised knobs that hold 3/8″-5/8″ PEX tubing with minimal use of staples or the need for wire tying to grid work.
Typically my radiant floor installs consist of using 2-1/2″ foam board staples to attach 1/2″ oxygen barrier tubing directly to 2″-25psi 4’x8′ foam board insulation. Normally the insulation is installed by the general contractor or another sub but I have done it many times so installing the Rapid Grid was useful for comparison purposes.
Our building code requires a vapor barrier, regardless of the insulation system used but the typical 4’x8′ foam board also requires a poly seam tape coverage on all joints. That’s the main difference I took away from the actual laying of the Rapid Grid. The Rapid Grid has a directional tongue and groove type of system that joins each piece to another. This overlapping joint system negates the need for sealing the seams and also holds the insulation together well.
I did go over each loop and staple where I felt needed, especially on each loop end. Staples are not entirely eliminated but mostly due to the memory in coiled PEX tubing. The tubing is held very well withing the Rapid Grid knobs however its not perfect. Watch close in the video and you’ll see very brief spots where I stapled in between loop runs.
Costs
In the end, after a cost comparison using current pricing available for 4’x8′ 25psi foam insulation board and my current pricing from a local supplier, Rapid Grid is higher price per sq. ft.
My thoughts
Given the labor savings, this system was installed in just over 3.5 hours verses an average 4.5-5 hours of my typical installs this size, I can see the Rapid Grid being competitive when typical foam board market pricing is elevated. This floor is just under 3K sq ft, smaller projects like slab on grade additions could be an excellent application.
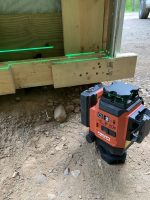
Hilti’s newest laser entry into the cordless layout and measurement category comes with proven tech in a robust package. There is no shortage of line lasers on the market today. The PM 30-MG cordless multi-line laser from Hilti is 360 degree green beam laser powered by their Li-Ion B 12/2.6 battery. I have been working Read more
Hilti’s newest laser entry into the cordless layout and measurement category comes with proven tech in a robust package.
There is no shortage of line lasers on the market today. The PM 30-MG cordless multi-line laser from Hilti is 360 degree green beam laser powered by their Li-Ion B 12/2.6 battery.
I have been working with the PM 30 Hilti laser for a couple months, primarily using it for simple layout and leveling in different tasks like panel radiator installs or boiler piping layouts. I’ve used both the included wall mount bracket and magnetic base. The PM 30-MG has a very useful fine adjustment dial at the base that makes for quick alignment when rotated either direction.
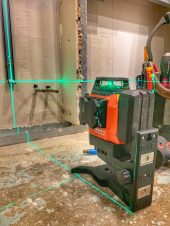
Bracket alignment for hydronic panel radiators.
The Hilti PM 30-MG is intended for indoor use
Hilti has other laser models intended for outdoor use but as stated in the manual the PM 30-MG can be used outside if conditions are dry (manual pg 5, sec 3.2). Its intended use is to allow a single person to transfer right angles, level horizontally, carry out alignment work and plumb accurately.
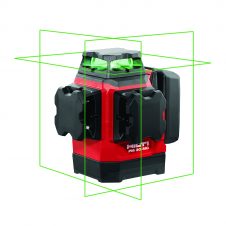
The product has three green 360° laser lines, a reference point directed downward on the right-hand front of the measuring device, as well as four beam intersection points (front, back, left, right and above) with a range of approx. 65ft/20 m. Range depends on the brightness of ambient light.
How long will the battery last?
Runtime will vary based on laser projection. The ability to select plumb, level or cross-line (both plumb & level) beams depending on the job at hand will determine the battery life. Max operating time is published at 12 hours, I have used the PM 30-MG enough for one battery recharge but the bulk of my use has been in the cross-line mode. The selection of beam projection is easily done with a single button on the side of the laser housing.
 Self-leveling or Locked
The Hilti PM 30-MG can be set to auto-level or locked for use of setting slope. This is done with the sliding power button on the side of the unit. In the locked position the leveling pendulum is fixed allowing for grade or slope projection on a horizontal plane. Moreover, the unlocked (most used mode) will allow the pendulum to self-level. If the laser is not able to self level the projected beam(s) will blink rapidly until corrected.
The tool complies with Laser Class 2 in accordance with IEC / EN 60825-1: 2014 and in accordance with CFR 21 Sec. 1040 (FDA). These devices can be used without further protective measures. Nevertheless, as with the sun, do not look directly into the light source. If you do inadvertently look into the laser beam, immediately close your eyes and move your head clear of the laser beam. Do not aim the laser beam at persons.
Finally, the Hilti PM 30-MG is backed by Hilti’s 20 year materials and workmanship, 2 year wear & tear coverage and 1 day turnaround in the repair center warranty. The Hilti PM 30-MG laser was shared with mechanical-hub.com ProStaff member Eric Aune via Hilti’s tool lease program free of charge and will be returned after use required for full tool review. You can find more info for this and other Hilti products and tools on their website: hilti.com
Job site pics of the Hilti PM 30-MG
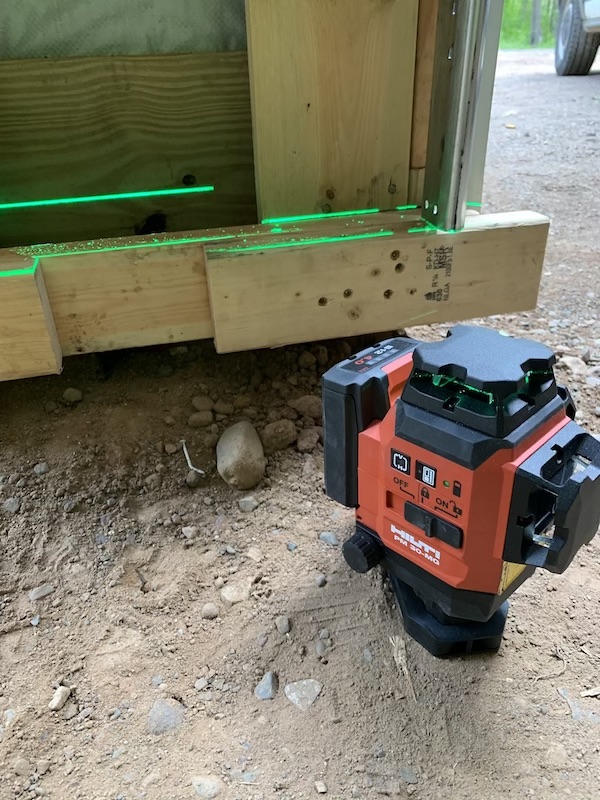
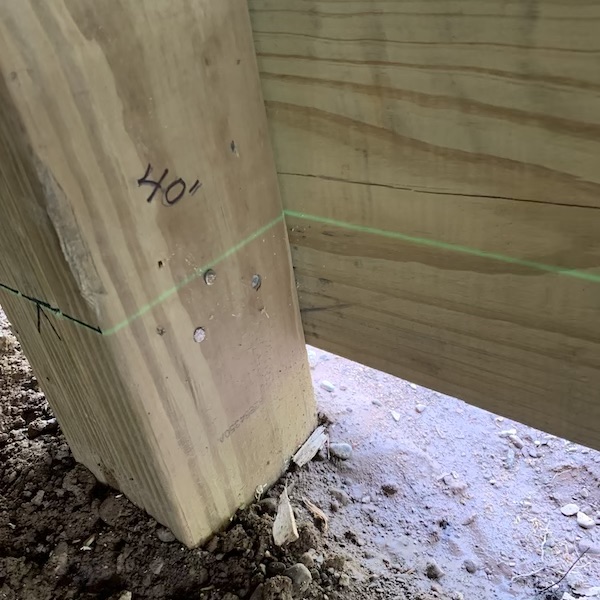
With a intended max working range of 65ft the line stays crisp at 40 in shaded daylight.

Same conditions and site as the 40′ measurement, at 80 feet the line is getting much thicker and less crisp.



Ah, the age-old question: is it duct tape or duck tape? Although often mispronounced, it’s actually duct tape (Duck is a brand of the tape) and covers a class of pressure-sensitive tapes that consists of three layers: polyethylene (plastic), scrim (mesh fabric) and rubberized adhesive. Yet, even with that clarification, the term “duct tape” can Read more
Ah, the age-old question: is it duct tape or duck tape? Although often mispronounced, it’s actually duct tape (Duck is a brand of the tape) and covers a class of pressure-sensitive tapes that consists of three layers: polyethylene (plastic), scrim (mesh fabric) and rubberized adhesive. Yet, even with that clarification, the term “duct tape” can still be a bit misleading – although it’s considered a fix-all that got its name from early-on usage in HVAC work, duct tape is, today, actually not recommended for use on ducts (though there are some versions that are approved for HVAC applications).
Here’s a rundown of tape types.
- General Purpose Duct Tapes: Typical Thickness: 6-9 mils, handy for DIY home projects or light duty patching and bundling for pros on the jobsite.
- Heavy Duty Duct Tapes: Typical Thickness: 10-17 mils, every tradesperson should keep at least one roll of heavy duty duct tape in the toolbox — and multiple widths or colors won’t hurt.
- Clear Repair Tapes: Typical Thickness: Approx. 7 mils, your go-to tape for airtight, waterproof repairs on any surface that needs to be seen.
- Structural Grade Duct Tapes: Typical Thickness: Approx. 17 mils, the most robust option for extreme jobs, including those that require a rope or chain.
 Duct tape is undoubtedly one of those versatile items that’s earned a place in just about any toolbox. It’s flexible, resists tearing, and sticks to just about anything. As contractors know, when it comes to jobsite efficiency, having the right tools for the job at-hand makes all the difference—and saving time means saving money.
The Mechanical Hub ProStaff team recently took on the challenge of trying out a new tape to see if it was the one to grab to ensure the fix doesn’t fail and can save time, money and a lot of space in the toolbox.
Traditionally, ropes or chains have been the only option for contractors and installers when they encounter jobsite tasks that require intense strength and durability. Until now as one 36-inch loop of new T-Rex® Brute Force® can hold more than 700 pounds of weight and offers superior adhesion, so you can quickly secure, fasten and hold loads that you wouldn’t dare attempt with other tapes.
The high-bond, double-thick adhesive allows the tape to stick to rougher, dirtier surfaces and offers a durable, waterproof backing suitable for all-weather performance. Brute Force® represents the next generation of high-performance duct tapes with patent-pending Forge-Link™ Technology.
 ProStaffer Andy Mickelson of Mickelson Plumbing and Heating, Missoula, Montana, was impressed with the strength and said, “T-Rex Brute Force tape has an incredible tear-resistant design, so much so that you’ll require a blade to cut it. The adhesive layer is much thicker than any other tape I’ve used previously. The tape seems to hold well when bonded to itself and smooth surfaces alike, even when the surface is not completely dry. It will make a great addition to any travel box or tool box.”
“We have found a number of uses for T-Rex Brute Force! Someone didn’t judge the width of the truck while backing up and managed to rip off a side mirror. The mirror was put back into place and held there with the tape until we were able to get it into the dealership,” said Shay Shepston of Reimagined Renovations, Champaign, Illinois.
Shay added, “It’s been used to hold a foam base cove to metal before installing a pool liner, to hold PVC pipes in place while we work, and many other odd jobs. It has been added to all our trucks and toolboxes!”
According to our ProStaff team, the only drawback—and one they all mentioned—was that you cannot tear it; it must be cut. Contractors are so accustomed to just tearing tape, it required remembering to have a utility knife handy to cut it.
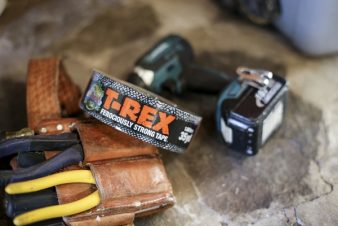 ProStaff member John Thompson with Thompson Family Plumbing & Rooter, with shops in California and Arizona, put it to work with his team and shared, “T-Rex Brute Force tape was fantastic to have on our work trucks. On multiple occasions it was used to build confinement areas with plastic, plus a last-minute repair to hold the casing together on my jackhammer because I broke it during a project. You never know when you might need something of this strength to get out of a jam.”
He joked, “I have never seen anything this durable. It’s truly remarkable to see the strength this tape has. I wish I could say that I’m putting together a zombie bunker, because I would seriously use it. It’s ‘Ferocious!’”
In addition to needing a utility knife to cut the tape, our ProStaff team suggested they would like to see the tape in more solid and neon construction colors such as red, white, green and possibly even reflective, as well as different roll size options.
T-Rex® Brute Force® is sold in 25-yard rolls and is available at national mass and hardware retailers. For more information, visit www.trextape.com/contractors.

Hot & cold frost proof hydrants are not new but the TrueTemp by PRIER is a totally different faucet compared to any I’ve ever worked with in the past. The TrueTemp is a single handle frost proof with the styling of an indoor fixture available in two finished, Satin Nickel Plated & Oil Rubbed Bronze Read more
Hot & cold frost proof hydrants are not new but the TrueTemp by PRIER is a totally different faucet compared to any I’ve ever worked with in the past. The TrueTemp is a single handle frost proof with the styling of an indoor fixture available in two finished, Satin Nickel Plated & Oil Rubbed Bronze.
Focus: True Temp Installation
As part of a larger review process, ProStaff’er Andy Mickelson, owner of Mickelson Plumbing in Missoula, MT and I are each installing one. Andy has a spot for it at his own home, I’ve got it going in at the #duluthbuild project for my little sister’s new home.

I took delivery of the Oil Rubbed Bronze finish 12″ model #P-118L12-ORB last week and took it out of the box minutes before the video to get it mounted.
One of the things that stands out immediately with this faucet is the lack of visible mounting hardware, I like that. As you’ll see in the video there is a stainless steel mounting plate/ring that when attached to the mounting surface is completely hidden. Furthermore, this gives the faucet a totally different look than other hot/cold models.
The faucet ships with Phillips head stainless screws and the mounting plate. There were no instructions in the box, although its pretty simple to figure out, I think it may have just been forgotten in packaging. Here’s a link to the install instructions.
Mounting Prep for the True Temp
I had a PRIER 12″ model frost proof faucet roughed-in already. This required me to enlarge the existing 1″ hole in the mounting block to accommodate the new TrueTemp. I simply traced the hole in the mounting plate and cut the mounting block with my M12 jig saw. The correct hole saw size would be 1-3/4″ if installing at a new location. Step two was to align the mounting plate hole with the newly cut hole and attach using the stainless screws. This step requires the installer to level the tabs on the mounting plate, the tabs are the connection point between the faucet and mounting plate and need to be level to ensure the faucet is plumb.
Finally, the TrueTemp body is inserted and a half-turn clockwise engages the tabs and body to securely position the faucet, the final step is to install the remaining stainless screw in the very bottom of the body.
Watch for more info, next time I’ll cover the piping connection options and hot I installed it on my job.

 Self-leveling or Locked